Thursday 30 May 2013

A Tangent

 Do you ever feel a piece of work is complete and that you add stitching to it, on advice, but reluctantly?  So it is with this piece to which I have now added lines of zigzag and by adjusting the top tension created this slightly foxed effect,which is surprisingly effective.

1.  Piecing with over-stitching
 Sample 2 below shows the same piecing method using dyed and embroidered fabrics.  No stabilising fabric was used making the strips, which are cut on the cross, difficult to handle, possibly they too narrow.  When I placed something like Stitch and Tear or Vilene underneath the organza looses its translucency and therefore I decided against it.

2.  Organza Piecing.
Sample 3 below show Sample 2 over-stitched in the same way as Sample 1.  It was not possible to apply the same density of stitch at the beginning of each line as the organza becames bunched under the machine and the width of the strip is further reduced.  What is successful, however, is that the tones in each over-stitched strip are more graduated.  Whilst I found Sample 1 was improved by the process I don't think Sample 2 is; maybe more experimentation would help, but for now my decision is made and I think I need to proceed with the collar ideas in my previous post.
3.  Organza Piecing over-stitched.


Monday 27 May 2013

Homing In

The photographs below show the next design phase, both construction and decorative elements.


1.  Three versions of Fin Inserts showing different decorative stitching.

2.  Preferred Fin Insert (view 1).

3.  Preferred Fin Insert (view 2).
 The preferred Fin Insert is a fourth version of the fin.  On this version the stitching is a double zigzag set on the longest length.  The top tension is loose so that the white top thread pulls through the dark petrol blue thread on the lower bobbin.  On the outside the stitch is a clear irregular scribble.  While using the same stitch (and in the same direction) on all the fins I wanted to make the Insert Fins darker.

4.  Collar Construction showing Main and Insert Fins.

Image 4 shows the Main Fins cut 5" wide, wider than previously.  Their edges are double zigzagged in petrol blue and then stitched part way round the tube-shaped Insert Fin creating a rippling embroidered additional edge.  The tube shape is created by inserting a short roll of stitch-and-tear stitched invisibly in place.  Further stitching is applied to the Main Fins on soft grey, petrol and thicker white thread. Each line of machine embroidery is overstitch and close cut.
This construction curves well round the cardigan neck.  The tuck made on each Main Fin makes it easy to make small adjustments so that the Insert Fins match on each side and are positioned on the shoulder.  The two collar sections are finished with two bias cut strips of silk organza.
Whilst the collar pleases my eye and I'm particularly pleased with the way the Insert Fins are constructed the embroidery on the Main Fins may still need a richer treatment.


Roads not Taken


Amongst a number of ideas I've decided against pursuing are printing using fabric paints, and printing on organza using the fish images taken early on in the module.


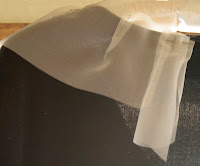
1.  Printing on Organza

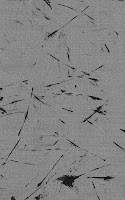
Printing with fabric paints on organza was a worthwhile exercise.  I discovered just how light a touch I needed to be successful, and the effect created when too much paint was applied.  I wrapped string round the roller to produce these sketchy marks; had I chosen to pursue the technique further I would have made some printing blocks. The marks on the piece above could have machine embroidery added.

2.  T-shirt Transfer

3.  Non-washable Organza
 The digital images produced with these two products are very clearly defined.  The t-shirt transfer, however, produces a thick matte coated surface which is too stiff for the collar, though stitching on it works surprisingly well.

I had expected the fish print to work well on the organza and I was not disappointed: the print is clear and the fabric's feel is soft.  However, it is much finer than the organza used in my other samples and has a blueish haze which does not look right when integrated with other organza pieces.(see Sample 4 below)
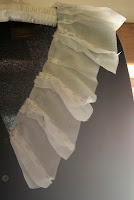
4.  Fibonacci Sample
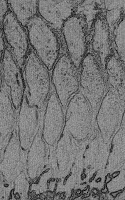
I also set out to explore how I could use the Fibonacci Sequence thinking that I could apply it to the construction of the main fins.  Sample 4 above shows this with its bands in a 1, 2, 3 sequence.

5.  Fibonacci Sample


6.  Fibonacci Sample

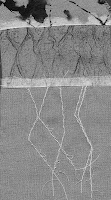
Samples 5 and 6 show how much more effectively a design can work when the dyed and machine embroidery is orientated in the same direction.  On Sample 6 I used a dark petrol blue to machine waving loopy lines through the dark dyed surface linking it with the two other fabrics. Whilst tonally I like this piece it has become yet another of my discards:  the seams create bulk and a tension which I can only overcome by machining any tucks I make down thereby loosing the sense of loft I like.  Also, when dyed the organza has a slightly crinkled appearance, though attractive does not marry-up well with flatter pieces.

So if making Fibonacci Sequenced fins doesn't work, will applying the sequence to the width of each fin as it curves from centre front to centre back?  

7.  Collar Toile

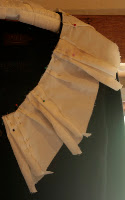
 For Collar Toile 7 I used the sequence 1, 2, 3, 5, 8.  I also had to include the width of the fin insert after each main fin.  The resulting callico collar need quite large tucks to make it fit.  Even though it fits the back view on image Collar Toile 8 clearly illustrate a rather flat looking piece of fabric which is at odds with my intention.
8.  Collar Toile

I also tried out a 1, 1, 2, 3, 5 sequence and a 1, 1, 2, 3, 2, 1, 1 sequence (Collar Toile 9) and came to the conclusion that my original thought of making all the main fins the same width was probably most likely to be successful by allowing me to position the insert fins where I wanted them.  In other words I was creating an unnecessary straight jacket for myself.

9.  Collar Toile


Three Dimensional Shapes

The tall central shape and the bottom right fin shape are influenced by observing fish.  An further idea would be to cut the top plan of the tall shape at a more oblique angle.

A Selection of 3D Shapes.


Sunday 26 May 2013

Richly Stitching

Below are a range of samples showing some of my experiments with stitch and dye on white silk organza.  I've tried to respond to both the traces of dye on the fabric and patterning on fish skins and the way they pulse when at rest or dart and weave through the water.  As always some are more successful than others.


1.  White and Metallic on Black

2. White and Dark Petrol Waves

3.  White on White

4.  Soft -dye with Stitching

5.  Stitched and Dyed

6..  Dyed and Stitched


Wednesday 8 May 2013

Edging Forward

Having been away for a week it's good to get back to stitching.  In view of this break Sian suggested I look through my work so far and select what seems relevant to the collar design and put it together on a pin board.  She also asked me to say why I'd chosen the items.  I came up with a list of words which they all seem to demonstrate: movement, rhythms, pulses, and reflection and refraction.  They arouse this response even though the techniques are different.  I particularly like the interweaving of what are really quite simple lines of machine stitch, also the transitions achieved between one tone and another in the woven piece and the random connections that are made between marks.  I like the fabric piece below it too and wonder whether it is possible to create a more subtle effect when piecing the organza.  I realise yet again that I'm so keen make decisions about structure without sufficiently taking into consideration tonal distribution.

Pin Board

My mind does feel less crowded now, however, there still seem to be a multitude of creative decisions to make.  

It's also been helpful to trawl through Sian's advice over the months since I first uttered the word "collar". So here then is what I'm proposing to work on over the next few days.

Treatment of Background Fabric:
1)  Test out printing, using a very light touch.  String round the roller to make the wave patterns on the paper sample above.
2)  White on white embroidery, followed by light dyeing after folding the fabric on the diagonal both ways aiming to achieve scale-shapes..
3) Try out using my images by printing the fabric with my printer.  Would you please send instructions for this, Sian?

Construction and Tonal Distribution:
1)  Machine embroider the collar sections I've already made.
2)  Make fin-shaped inserts even wider and using the narrow to broader zigzag machining as on the pin board machine along each edge. This should make the machining on the fin-inserts at right angles to the fins linking them.
3)  Try out stitching tonal organza strips together to make the main fins, thinking about cutting them in Fibonacci Sequence proportions broadening as the collar moves round to the centre back.

Collar Details
I've tried to show here my current thinking about the collar construction, of course the dance between fabric and construction goes on and there may be many more amendments yet.