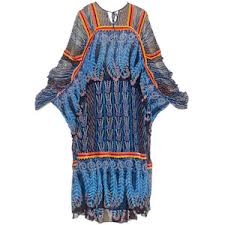
Monday, 9 January 2017

Chapter 12 : Research Three Artists


Zandra Rhodes

There are so many things to admire about and learn from Zandra Rhodes, her practice and designs. She is enormously hard-working and committed.  She transformed her love of colour and pattern into clothing designs which have become successful in the world of international high fashion.Through her teaching and later her Digital Study Collection she has made her knowledge and understanding of garment making available to those keen to learn from her expertise.


Zandra Rhodes was born in Chatham in Kent in 1940, during the Second World War.  She was introduced to the world of fashion by her mother who was a fitter for the Paris fashion House of Worth.  Zandra Rhodes trained as a textile designer, studying first at Medway College of Art in Kent, later at The Royal College of Art in London.  Her early textile designs were considered to be too outrageous to traditional British manufacturers so she decided to make dresses from her own fabrics.  She pioneered the untapped potential of printed patterns to accentuate and define the silhouette of garments.  She opened The Fulham Road Clothes Shop in 1967 with Sylvia Ayton setting up on her own and taking her collection to New York two years later.  American Vogue featured her garments and she began selling in New York and Britain winning Designer of the Year in 1972 and Royal Designer for Industry in 1974.  Throughout the 1970s and 1980s "her fashion shows were one of the highlights of London's fashion week.


In 2003 Zandra Rhodes opened the Fashion and Textile Museum in Bermondsey Street to to promote British design talent.  Her career has spanned over fifty years.  She was made a Dame in 2015.
What is it then I've learned from Zandra Rhodes?  The first thing is where she looks for inspiration: she talks about inspiration being "things at hand", whether it's a collection of buttons or the tulips in a vase on her table, or those she finds when travelling: a skyline in New York, a field of lilies in Japan, or a trip to Ayers Rock in Australia.

Zandra Rhodes: 1


Zandra Rhodes: 2


It is Zandra Rhodes' sketches which are her leaping off point.  She comments too that it's important not to throw any sketch away, even when it doesn't work out well, but to live with the mistakes and learn from them.  She also uses photographs to support her sketches.Her accumulation of sketchbooks is vast: a great archive of material which can inspire again and again.

Ideas are not necessarily used only once.  Zandra Rhodes talks about the cross fertilisation of ideas, how a sketchbook note or drawing can link with another elsewhere, or be sought out when it connects with a new observation or experience.  A good example of this is her re-use of the feather motif.

Zandra Rhodes: 3

Image 3 also illustrates how some of her fabric designs broke with convention.  Rather than an allover pattern covering the length of a piece of cloth her fabric design might  marry several interrelated patterns inspired by her research, patterns which differ in any number of ways, such as scale or density or tone. Some of her prints are designed on a quarter circle. This method of designing requires a wholly different approach to garment making and enables her complex designs to be used to best effect to enhance the body shape.

Zandra Rhodes is noted for her use of colour.  Take a look at its vibrancy in these two colour versions of her feather fabric: one softer hued, the other eye-poppingly vivid, both equally successful.


Zandra Rhodes: 4

Zandra Rhodes: 5

Colour is important too in the early phases of printing a new Zandra Rhodes fabric.  After the background colour is chosen work is carried out by the screen printer to check the proportions of the printed colours  used to ensure that they not only work together but also with the background.  

Further attention to detail can be found in the finish of garments such as the complex use of techniques in image 6.  Pleated frills may have a zigzag edge giving a colour accent picked up from elsewhere in the garment.  Other hems are finished by enclosing fishing line in the rolled hem.  This creates movement and drama.


Zandra Rhodes: 6


The drama of Zandra Rhodes' designs comes from an experimental approach to her work, an inclination that rules nothing out.  For example her treatment of the seams in the Dinosaur Coat, a design feature which she again uses down the front of the coat.  


Zandra Rhodes: 7

Embellishments too are part of the Zandra Rhodes' story.  The embroidered flowers on the Dragon Coat create a colour accent. whilst other garments may be lightly beaded along an edge or densely sequinned and beaded as in image 8.

Zandra Rhodes: 8
Seeing the drama created in Zandra Rhodes' designs it is not surprising that her career has turned towards the theatre where she has designed costumes and sets for operas.  Nor has she allowed her ideas to become stale, as in this punk-inspired evening dress below. 


Zandra Rhodes: 9


Zandra Rhodes has a strong business sense; her catwalk shows are innovative and crowd pleasing and she is will abandon a range (such as the one in denim) when it proves too labour intensive to be commercially viable.  She has talked about needing space to find inspiration for her work and the need to feel conviction in her designs.  In an interview she commented that if you were looking at someone else's clothes and thinking they were better than your own you were not answering your own questions.


Deidre Hawken


Deidre Hawken 

Deidre Hawken is a designer maker specialising in couture millinery headpieces.  Originally she trained as a stage designer at Central School of Art and Design, later in 1998 QEST awarded her a scholarship to study couture millinery.  Her work is exhibited and sold widely, both here and abroad.  Her work is also held in many permanent collections in such places as the Victoria and Albert, the Kyoto Costume Institute and The Metropolitan Arts Museum in New York .  She is a Fellow of the Society of Designer Craftsmen and a Fellow of the Royal Society of Arts.  She has also worked for the Royal Opera House and Ballet as well as film and television.

Broad Bean Hat


The Broad Bean Hat is part of a V&A Permanent Collection.  The museum's website gives a really clear idea of the materials and techniques Deidre Hawken uses.  The headpiece has a blocked canvas base covered in dyed silk organza, the edges wired and bound in the same fabric.  The assorted salads are cut to pattern using dyed silk taffeta and silk velvet some of which are wired.  To create the lettuce leaves' crinkled effect the dyed silk organza was scrunched into a tight ball, tied with string and left to dry. The pecorino shavings were made from dyed silk taffeta and organza; the peas and beans from epoxy resin which was handpainted and attached to wire; the pea shoots were created from pieces of wire covered in florists tape.  All of the components were handsewn to the base.

To finish the headpiece was lined in dyed silk taffeta.  It was designed to be worn on the side of the head and has an integral hair comb inside to keep it on the head.

It would be really interesting to have some insight into the early creative processes of headpiece design -- the inspiration material, the drawing and experimentation that happen to ensure that the materials and texture reflect the salads and vegetables Deidre Hawken is trying to recreate.  Of course there are very particular considerations when making a  headpiece: its weight, size and shape and whether it will be in proportion to the wearer. These factors will also affect the way in which the headpiece is attached to the head and the way in which it can be worn.  The balance between aesthetics and practicalities is always in the mind of a designer-maker especially when the designs are also aiming to create drama and impact.

Nasturtium Hat


So where do Deirdre Hawken's ideas come from?  Her work is described as delicate and whimsical. Flowers as an adornment for a headpiece are unsurprising, fruit and vegetables have been tried before though not in this way, but patisserie, is attention grabbing, intriguing and thought provoking to say nothing of a tin of tuna.

Deidre Hawken

 It is suggested that Deidre Hawken's current work explores the often ambiguous relationship women have with food, and that her ideas are influenced by Surrealism.  Her work is curiously beautiful and inventive not only drawing admiration for those exciting qualities but also for its exquisite craftsmanship.


Shuna Rendel


Beauty is found in many forms and created from many different materials.  Shuna Rendel's art works are beautiful and strong with the power to draw the viewer in and captivate them, sensing some of the tension and excitement inherent in their making.


Shuna Rendel trained as a  a sculptor and her work is informed by research, analysis, experiment and manipulation using basketry and textile techniques from all over the world.  Disciplines as diverse as architecture and textiles provide the context for her creation of stable forms from flexible materials. She holds a large collection of baskets from all over the world.  These have been made using a variety of techniques such as weaving, coiling, netting, linking, looping and lashing and she uses them for research and analysis. 


Shuna Rendel's three dimensional flexible sculptures use natural materials and traditional techniques.  Her manipulation of forms challenges materials and their natural qualities.  She takes a simple line and form and gives it life by exploiting the materials' flexibility by twisting, pulling, turning and stretching.  Her research and sampling ensures the appropriate choice of materials and technique so that she creates a manipulated material light or dense enough to convey the continual pounding of the sea on stones or the protective encasing ribs give vital organs.


Break, break,  break on thy cold gray stones, O Sea

Ribbed Form


"Break, break, break on thy cold grey stones, O Sea" and "Ribbed Form" illustrate the challenge of creating such structures from the natural materials Shuna Rendel favours.  She describes the act of creation as "drawing in space" and when successful she overcomes the flexibility of the material's natural movement and harnesses it to make forms which  reveal movement of line within the surface structure of the piece.  "Each piece is a a search for that essential tension between flexibility and fracture, stability and collapse."


Dark Form

In the making of Dark Form Shuna Rendel combines the use of wire with natural materials such as hemp and chair cane, both of which have been dyed.  The harmonious tonal range she uses ensures that the eye is drawn to the rhythms and movement within the piece and looking at Shuna Rendell's work has helped me to understand more clearly these aspects of design and making.


Monday, 22 August 2016

Slashing and Rhythms


Yet another thought I brought along to discuss with Sian was the idea of slashing.  The ground of my piece is made up of four layers: a piece of dark grey silk, a silver metallic cloth, bronze-grey shot silk and the top layer silk organza.  In stitching narrow parallel lines of varying length and slashing through the three top layers I thought the surface could be further enriched, bringing toning colours and rough texture to it.

1.1 Close-up


1.2 Close-up


1.3  Still Small Voice of Calm


1.4  Left Edge Detail
1.5 Right Edge Detail


Sian talked to me about using a rhythm to apply the cords and this I have tried to do, and with the slashing and later with the application of fine stitching and beads.  Hopefully all the techniques are fully integrated and look right.

Here then are views of the finished piece, though it may be a little premature to say so.


Mounting Resolved Sample

I mounted this resolved sample soon after I completed the piece in August. Sian and I had discussed cropping it at Summer School and as you can see from Image 1:3 in my last post I adopted the idea.
I took a thick and textured piece of rag paper, measuring 55cm x 44cm giving a lovely wide surrounding area to show off the textile piece. I cut two carefully measured slits and positioned the piece along the tacked lines I'd marked when working on it, taking them out afterwards, of course. I then used acid free tape to position it, only at the top so that it is supported: it is exactly the same approach I use with my photographs. As you can see the result gives two horizontal clean edges and two curved and softly layered vertical edges. I think it works.

Cords

So I have confirmed the ideas about the ground for this piece it's time to work out how best to apply the cords and threads.

Before the summer school I had made a selection of fine cords in my colour scheme and in her feedback Sian had suggested grouping them together then applying them, but how to achieve this.

In the back of my mind was  a television programme, part of a series made by Dr. Jago Cooper, exploring ancient civilizations (something I find endlessly fascinating) of South America.  What was appearing through the fog in my mind were knotted cords made by the Inca.  They were arranged in various lengths, knotted along their length and tried to a base cord.  In the image below they almost look as if they might be a collar.  On investigating further the knots turned out to be formed by twisting and knotting the cord in three different ways.

Even more exciting than the look of this artefact was its purpose.  My preferred explanation for its creation was as a story-telling device, a holder of history and memory.  Another explanation is as an abacus or some way of keeping accounts, but that's not really to my taste, though I can see how that idea sprang to mind.

1.1 Inca Quipa Knots
1.2 Forming Quipa Knots


Possibilities and Making Decisions

And what a lots of possibilities there are and so many as a result of Summer School and the opportunity to discuss this work so far with Sian and where I might take it next.

Alone in my workroom the possibilities juggle one with another: if I take this decision, then that may be the result, on and on in a never ending range of combinations.  If you don't actually sample those combinations there is no way of seeing how each one works -- no compare and contrast -- no making a choice of what works best.

When Sian initially told me she thought I wasn't particularly good at making decisions I wasn't completely accepting of the idea.  Now I've had some time to digest the thought, I've decided she may well be right.  So here then is the ebb and flow of sampling and deciding how my resolved sample should look.

At my tutorial we discussed the smaller complex circle, based on the paper-cuts, and whether it had a place at all as part of the design.  Though the colours of this element were in my colour scheme it did jump out as possibly too strong both in colour and texture: it was made of cotton and felt rather than silk and organza, and unlike those I'd dyed neither of them myself.  (Interestingly having too broad a colour scheme was the same error I made at Summer School with Flint Brocade.)  The way I had tried to integrate the two circles work was by adding fine springs made of cords and clustering beads around them, but it wasn't sufficiently successful to continue along that path.  Instead Sian and I talked about cutting into the main circle to reveal the shot silk beneath; this toned much better, but felt rather an extreme action to take.

My next thought was, if I'm going to cut into my piece of work do I need a minor circle at all?  I did,with just the knotted cords across somehow the piece seemed to lack any purpose, so to me the minor circle was a must.

Orientation was also a discussion point and we decided not only to turn the piece, but also to crop it.


Sample 1: Starting Point

Sample 2 : No circle at all

Back home and with so much in a state of flux, I sampled different size minor circles: smaller or even smaller and came to the conclusion that the proportions of the original size were in fact just right.


Sample 3 : Smaller Circle

Sample 4: Smallest Circle

Sample 5 : Just right

  And still resistant to the idea of cutting through the lovely top circle of carefully dyed, printed and pieced organza I began to explore other possible treatments of my perfectly sized circle, trying printing, trapunto, and printing and trapunto combined.  Finally I recreated a circle, like the felt and cotton one but only in shot silk, gradually cutting into it until it needed reconstructing and supporting on another circle resembling by this point a skeleton.  This was  a wholly unnerving experience.


Sample 6 : Printed

Sample 7 : Printing with Trapunto

Sample 8 : Deconstructed and Reconstructed

Wednesday, 13 July 2016

Flint Brocade

Here I am at home trying to make something of the samples I started and tried not to finish while I was away, wanting to work on them in a more considered way and becoming even more emotionally engaged with some of the pieces.

I'll start then with the solufleece challenge and try to work out what I've learned through the process.


Flint Design Stage 1

So here is the piece when I finished Summer School.  I've used the threads in the colours and textures I had available, quite proud of myself for getting on with the job rather than prevaricating too much.  When packing my threads I recalled the restrained palette of those travelling from abroad and tried to emulate it -- just bringing the colours that would match my images with an eye to their texture too.  As you can see I changed my mind when I got home.


Flint Design Stage 2

When I used the grey-brown Herdwick wool Jean had said, "You've nearly got away with it."  She was right, I hadn't, and in spite of the lovely couching and wrapping the first thing I did was to rip it out and replace it with a taupe colour.  It's tonally more in keeping, though texturally perhaps not so good.  If I were doing this piece again I would go still more shades paler.  And here's the thing, I used flint walls as the jumping off point for my Foundation Module and had a range of threads and colour sampling there at my finger tips in the lovely little book I made.  Another lesson learnt: don't forget to refer to your archive you probably have been through these thought processes before.


Flint Design Stage 3

So here we are very, very many layers of sorbello stitch on -- what a wonderful addition to my stitch repertoire.  I've used a huge range of muted threads to create a connective web between the rows of flints.

Flint Stage Stage 4: Flint Brocade (4"x 3")

 The final image shows the piece after washing and drying.  It's hard to put into words quite what I think.  The fact that I'm not enthusing tells me there's a mismatch between the expectation of Stage 3 and the reality of Stage 4.  Being new to this technique I find myself wondering whether the choice of visual reference was appropriate or is it the way I carried out the task?

Could the way the piece looks be the result of how it was washed out?  The water was only luke warm when I washed the piece, but the fibres do seem to have shrunk tightening the lovely lacy sorbello bands and flattening the piece's depth and the threads with sheen have become matte.  Maybe it's a case of less is more and next time the stitches should be less dense.

For the most part I'm pleased with the thread colours, though the blue-grey variegated thread seems more prominent than I would like them to be.

Next steps: perhaps a little more sorbello stitch in fine threads to recreate some of that cobwebby effect I so like.  And perhaps another go.  I saw this wonderful concrete wall yesterday . . . complete with ribs of rough-cut stone mixed into the mortar -- Concrete Brocade, now there's a thought!

Saturday, 4 June 2016

Chapter 9 : A Resolved Sample


The image below is a photograph of the many spiral staircases giving access to various buildings at the University of East Anglia (UEA) in Norwich.  It was manipulated in Photoshop for my photography course some years ago and when I last discussed this resolved sample seemed like the ideal material.  However, a year's a long time and having taken other photographs of this and other spiral staircases at UEA I'm feeling less certain.


1. Manipulated close-up Spiral Staircase


2. Window Exercise


I tried out the windows exercise not only exploring the idea of composition but also trying to look at the range of tones.  The triangle, semi and full circle produced the most dynamic compositions, but I was rather disappointed with the tonal drawing: it seemed to lack boldness  Maybe it is true to the image?  Maybe the tonal range is subtle which I would like it to be but does it have enough interest?  I was also unsure about how much movement there was in any of the compositions.  Hence the expedition to photograph these other spiral staircases.


3. Mid-distance Spiral Staircase


or:
4. Mid-distance Spiral Staircase

5. Close-up showing glimpses of landscape


As you can see there's a surfeit  of spiral staircases at UEA, and yes I do have even more!

Below is an attempt to create the spiral staircase in image 4 as a paper cutout.  I used a semi-circle taking an off centre position on its diameter and using Fibonnacci sequence divided the shape into imperfect sectors.  Each shape is larger than the next and placed to make a repeating pattern.  The background can clearly be seen between the imperfect sectors.  (By imperfect I mean they don't actually fulfill the mathematical definition for a sector.)


6. Paper cutout version of Image 4

This idea seems more fluid than the initial one, though in being fluid it might simply look muddled.  While waiting for some advice it might be worth trying out some paper cuts to test out my ideas for image 1 of the spiral staircases, and what a difference colour makes.


7. Paper cut of Image 1


8. Paper cut of Image 1


9. Paper cut of Image 1


Paper cut 9 is orientated in the same way as Image 1 and below interpreted in fabric,  The background dark grey is fabric strips which have been overlapped and stitched.  The lighter grey element is strips stitched along their centres and folded in half.  Finally the ice blue element is cut from felt, now half the width of my original design and more in proportion as a result.  All are bought fabrics from stock.


10. Paper cut interpreted in fabric


11. As above with the addition of a rich brown cord


My concern with taking this design forward is that it may not sufficiently convey movement.  With that in mind I traced Paper cut 9 and then extended the lines beyond the circle.


12. Tracing of Papercut 9 with extended lines.


This does, I think, give a sense of movement. The result is almost like a planet orbiting.

Two possibilities occur to me as ways of interpreting this idea.
Firstly, mount the circle offset on another larger circle which is printed and stitched. possibly including some Tyvel treated with the heatgun.  This larger circle will be tonally paler and will include the extended lines.
The second is not dissimilar to the first except that smaller circle is cut out of the larger one.  In both cases the treatment of the circle edges will need great care as to their finish.


Monday, 23 May 2016

Chapter 8 : Beads

 Reading the comments of others about these beading tasks I recognise their surprise at enjoying getting to grips with this type of work.  There's something exacting about it: the mere threading of such fine needles until you discover those with the very clever collapsible eye, though they're not suitable for every task.
I marked the area to test out each idea making it I thought quite small (4cm x 4cm), though in many cases I reduced and reduced it again.  I tested out shapes, sizes and colours of beads in combination, many I rejected as too clumsy or unsubtle, discovering on the way that tiny mauve seed bead with a gold core was indispensable.
The samples were stitched on calico and hopefully show a balance of both structured and free.

My samples then are as follows:

Key to Beading Sampler

     Row 1
1. Graduated lengths of dark grey shiny bugle beads to create a spiral.
2. Grey straight bugle beads (as above) arranged in alternating lines with multi-faceted oval crystal          beads.
3.  Tiny spiral in matte grey-brown seed beads.
4.  Brown medium and tiny mauve seed beads worked densely in rows.
5.  Bugle beads as in (1) worked in four pointed stars to create a diamond pattern.
6.  Stitched diamond pattern studded with small silvery beads and the tiny mauve seed beads.

     Row 2
7.  Rows of clear sequins threaded and arranged in alternating directions.
8.  No beads, but knotted wire in plastic randomly arranged.
9.  Bronze and grey shiny seed beads densely, but randomly arranged.
10.Oval copper sequins (the hole at one end) stitched so that they pivot and created a raised irregular        surface.
11.Circular and oval rings paired and stitched randomly, anchored with a tiny mauve seed bead.
12.Clear sequins topped with small brass cupped sequins and tiny mauve seed bead arranged in rows      and stitched with metallic bronze thread.
13.Dark grey bugle beads threaded with tufts of ice-blue floss and arranged in rows alternately with         groupings of metallic grey seed beads.
14.Oval copper sequins acting as a leaf shape and enhanced with stitching in metallic brown-black.

      Row 3
15.Parcels of long twisted gold and shorter grey bugle beads couched in position with thick soft gold        thread.
16.Groups of three brass cupped sequins interspersed with loops of mauve seed beads.
17.Rows of grey metallic bugle beads a brass cup sequin and mauve been attached to each end.
18.Chevrons of gold bugle beads.
19a,Dark grey bugle beads attached as towers with ice-blue thread.
19bTiny gold sequins arranged in rows and couched with a cross in metallic brown thread.
20.Clear large beads topped with tiny mauve seed beads and couched with three double thickness            stitches.

      Row 4
21.Spirals of small brass cupped sequins face downwards with self-dyed silk organza seed stitched on      top, then beaded with mauve seed beads.
22.Double holed grey oval beads applied in rows with brown metallic thread.
23.Grey beads as in 22 topped with two mauve seed beads and edged with metallic grey bugle beads.
24.Curves of metallic grey bugle beads alternating with curves of mauve seed beads.
25.Rows of a range of different beads from the selection.
26.Double holed clear oval beads stitched to create beetles.

Beading Sampler

I decided to mount the beading sampler on a piece of foam board covered in polyester fleece.  I then beaded three edges in the same way, initially a long grey bugle bead followed by a medium sized brown bead.  In a row behind this I stitched loops of five mauve seed beads, as is shown below.

Beaded Edging -- top and two sides

The sampler's lower edge shows a range of fringing ideas:

B. Lines of grey bugle and brown seed beads arranged in various ways with loops of mauve seed              beads to finish.
C. Three lines of mauve seed beads with a gold bugle beads, sequin and double holed oval to finish.
D. Single line of mauve beads, grey bugle bead, clear sequin, finished with a brass cup sequin and yet      another mauve bead.
E. Continuous edging alternating large clear seed bead and grey bugle bead.

Beaded Edging - lower edge

A final word on mounting: in spit of, I thought, very careful measuring and cutting it is difficult to be really accurate.  I also found spacing the beads for the edges needed a combination of measuring and eye.

This is complete, and yet when the edging was half stitched I wanted to add some sort of border as a bridge between the density of the centre and the lightness of the edging.  Unfortunately I'd stitched through so many of the calico layers and though I might damage the sampler if I started unpicking. What I had in mind was to allow the little bead beetles to scurry amongst the copper leaves with trailing foliage (26 and 14).  Maybe there will be time to test out the idea, certainly it was something that needed careful planning and well before the mounting stage.