Wednesday, 8 May 2013

Edging Forward

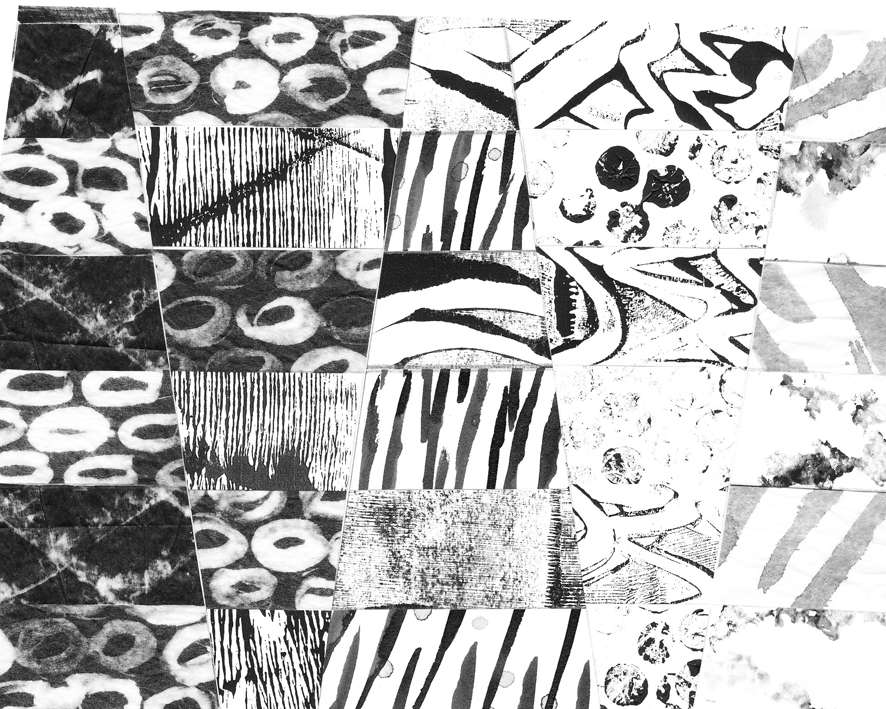
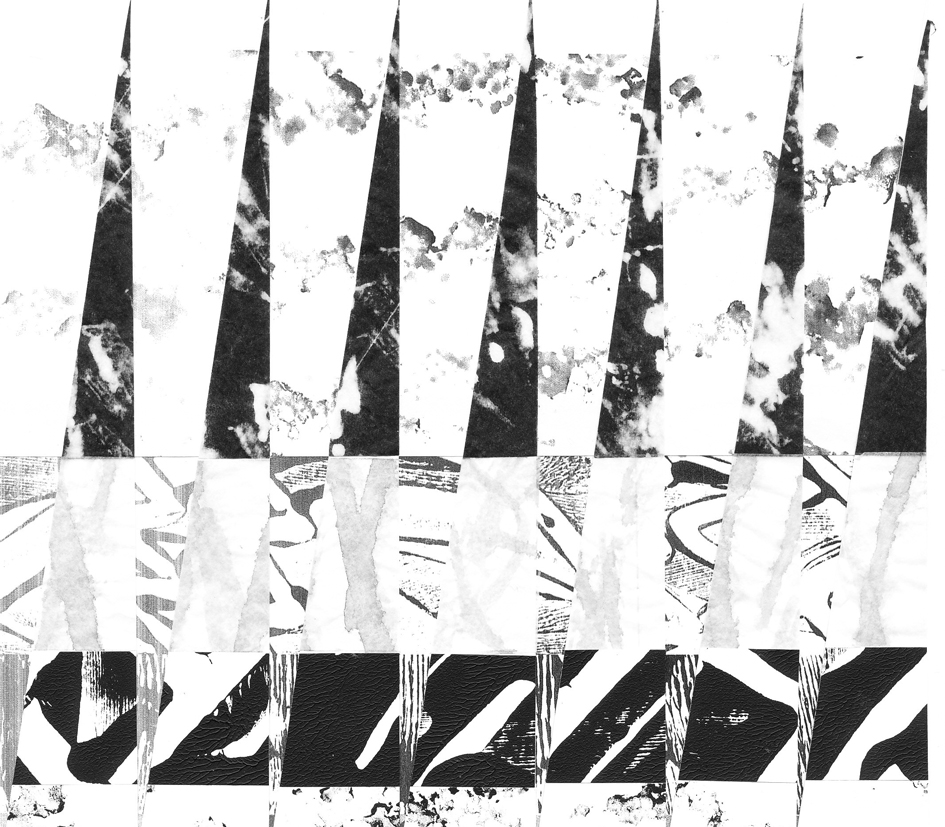
Having been away for a week it's good to get back to stitching.  In view of this break Sian suggested I look through my work so far and select what seems relevant to the collar design and put it together on a pin board.  She also asked me to say why I'd chosen the items.  I came up with a list of words which they all seem to demonstrate: movement, rhythms, pulses, and reflection and refraction.  They arouse this response even though the techniques are different.  I particularly like the interweaving of what are really quite simple lines of machine stitch, also the transitions achieved between one tone and another in the woven piece and the random connections that are made between marks.  I like the fabric piece below it too and wonder whether it is possible to create a more subtle effect when piecing the organza.  I realise yet again that I'm so keen make decisions about structure without sufficiently taking into consideration tonal distribution.

Pin Board

My mind does feel less crowded now, however, there still seem to be a multitude of creative decisions to make.  

It's also been helpful to trawl through Sian's advice over the months since I first uttered the word "collar". So here then is what I'm proposing to work on over the next few days.

Treatment of Background Fabric:
1)  Test out printing, using a very light touch.  String round the roller to make the wave patterns on the paper sample above.
2)  White on white embroidery, followed by light dyeing after folding the fabric on the diagonal both ways aiming to achieve scale-shapes..
3) Try out using my images by printing the fabric with my printer.  Would you please send instructions for this, Sian?

Construction and Tonal Distribution:
1)  Machine embroider the collar sections I've already made.
2)  Make fin-shaped inserts even wider and using the narrow to broader zigzag machining as on the pin board machine along each edge. This should make the machining on the fin-inserts at right angles to the fins linking them.
3)  Try out stitching tonal organza strips together to make the main fins, thinking about cutting them in Fibonacci Sequence proportions broadening as the collar moves round to the centre back.
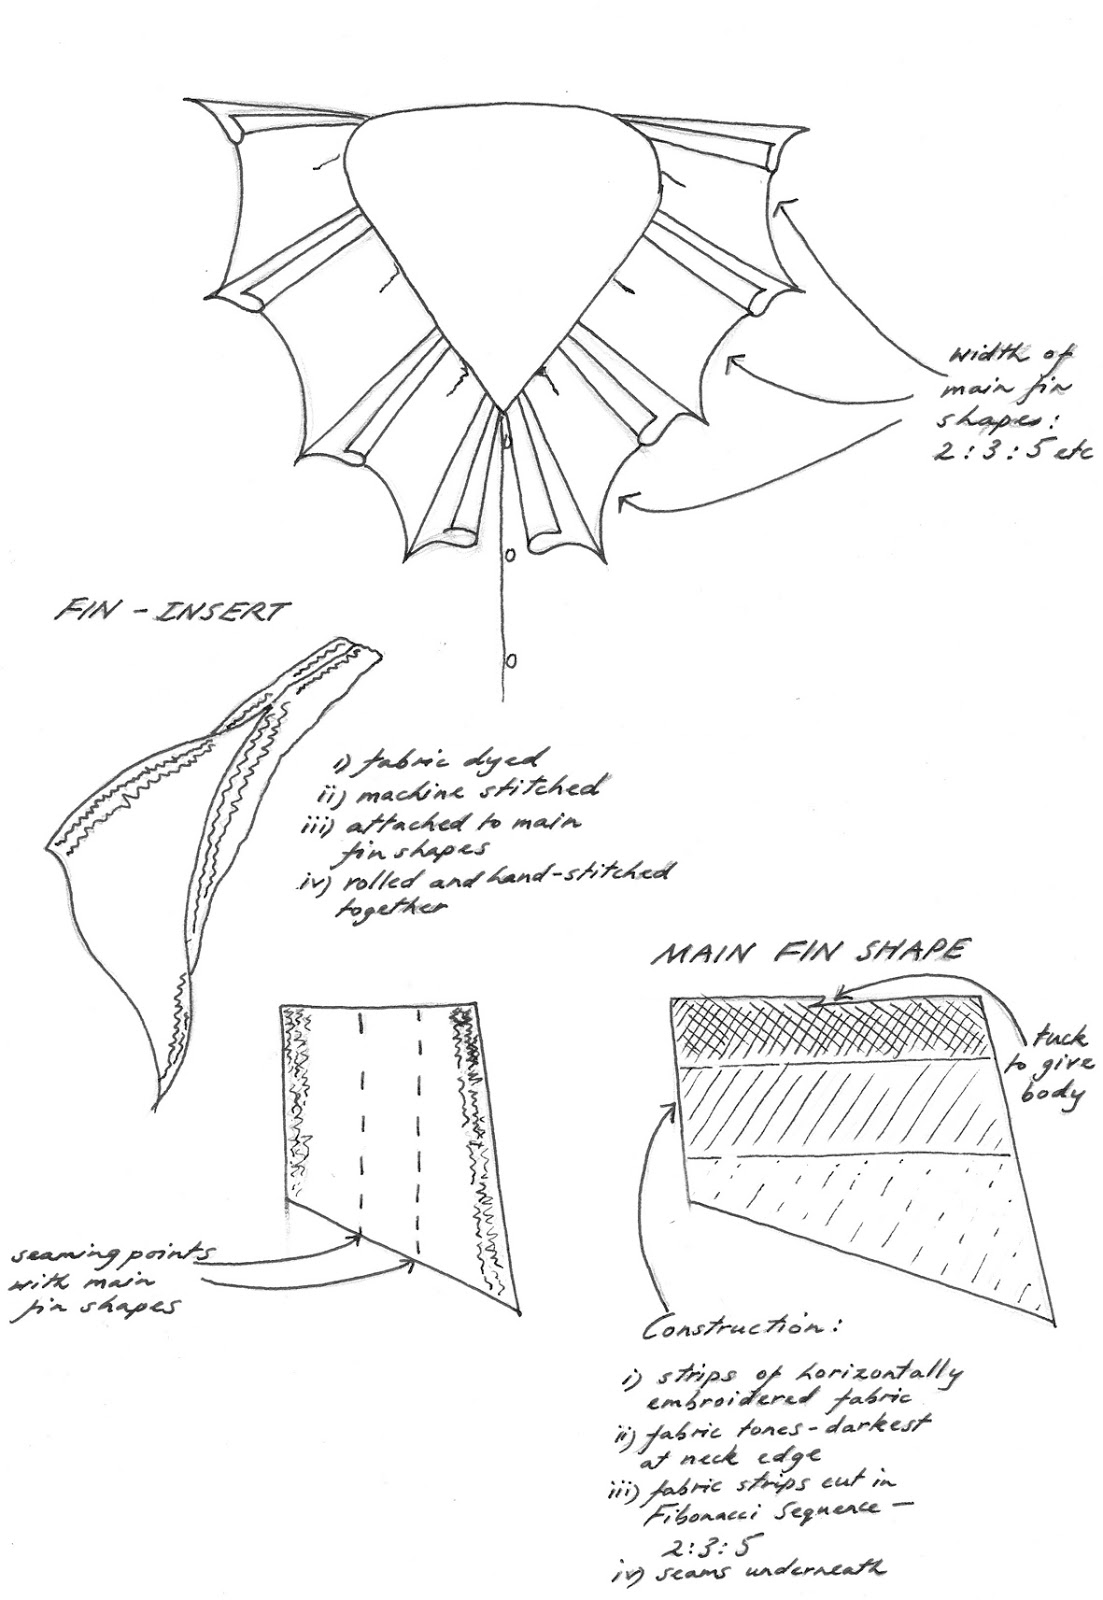
Collar Details
I've tried to show here my current thinking about the collar construction, of course the dance between fabric and construction goes on and there may be many more amendments yet.

Friday, 26 April 2013

Chapter 11: Further Design Exercises leading to Fabric Samples

The following samples show a number of ways of arranging different paper strips.

Sample 1
Sample 2
Sample 3
Sample 4
A selection of the boldest patterns showing gradations of tone.  In Sample 1 the darker tones are interspersed with lighter ones, whilst in Samples 2-4 the tones move from dark to lighter.

Sample 5
Above, in Sample 5, narrow dark strip with deeper bands of pale tones.
Below, in Sample 6, strips of a narrow range of tones

Sample 6

Sample 7


More Design Exercises

Wedge-shaped tonal strips.

Sample A
Sample B
Sample C
Sample D
More complex designs.

Sample E

Sample F
Sample G
Sample H
Sample I
Sample J
Stack and Wack

Sample K

Lines of Machine Stitching on Bleached and Monoprinted Fabrics

It was really pleasurable to return to bleaching and monoprinting, and then use a range of threads with the machine to develop the surface further.  I then went on to embroider some of the bought fabrics and these appear in the stitched fabric samples.

Fabric Sample 1
Fabric Sample 2
Fabric Sample 3
Fabric Sample 4
Fabric Sample 5

Stitched Fabric Samples based on Earlier Designs:Stage A

 Translating some of the paper samples into fabric.  It's interesting to see how the embroidery and monoprinting interplays with the underlying fabric pattern and the design shapes.

Sample 1
Sample 2
Sample 3
Sample 4
Samples 3 and 4 show the right and wrong sides of the same sample.
Samples 5 and 6 again use some of the dark bleached and embroidered fabrics.  The effect is rich, almost velvety, but the effect is not overly clear on the scan.

Sample 5
Sample 6


Stage B

I was pleased with the way the tonal fabrics came together.  I tried to use the Fibonacci Series for each cut, though I must confess it became progressively more and more impossible in the third section.  I also seemed to be cutting mostly in one direction resulting in that section becoming more and more distorted.  Looking at that section now I probably need to do more cutting.  However, it is interesting to see the lines of text appearing amongst the assorted patterns.


Waiting for Magic


I had written a longer piece than the one you're reading now.  I felt the need to churn around why I wasn't making faster progress.  Too much introspection is not always a good thing, hence the shorter version.  The upshot of my thinking and some reading too is that I can read and write reasonably well and that it's taken years of practice to achieve that.  Why not apply that thought to Module 2?  It is easy to feel that you're falling behind, or falling short: aren't we always our harshest critic?  To find a way of moving forward is the thing.  And so to my reading .... Bridget Riley talks about encountering her ignorance and feeling that she needs to remove some "obscuring veil".  Her approach is slow and methodical.  There's some comfort in that.  In "The Art of Looking Sideways", a wonderfully quirky book, I came across a quotation about creativity, calling it "a leap across a chasm".  Isn't that just how it seems?  And so wonderful when it happens.  My conclusion then is that while I'm waiting for the next magic moment  I must just keep working away.  Now did it take all that thinking to come to such a lame conclusion?