Thursday, 22 March 2018

Pandora's Box

In which it's not the evils and miseries of the world that are released, but so many wonderful curiosities are discovered that it's difficult to keep my mind on the main aim: doing everything I've been asked to do in Chapter 4.  This mindset is off course the result of a number of things -- a long lay-off and loss of momentum, paper making being newish ground (though the day spent paper making with Jean Hart Mould was invaluable), a predilection to enjoy one aspect of any new craft and loop round again and again exploring only that. In my defense I've been reading Helen Terry's blog in which she suggests doing "at least ten variations of an idea, working quickly and encouraging the ideas to flow".

As ever my tendency to leap forward to my resolved sample is present, but it is exciting with each chapter and each technique to catch glimpses of what might I might use for that sample.  I'm sure I'm not alone in this?

I also need to add a reminder that at the back of my mind is the watery world I explored in Module 2:  the patterning on fish and their movement through the water, the North Sea and in addition the world of herring girls.  So many thoughts: too many thoughts.

                                                           *                    *                    *

Looking back at my last blog I mention more embedding, making paper on a range of meshes and adding shapes to paper.  And yes I will come to them, but not yet: embossing is currently my thing. So what I've done is revive my tissue paper pulp which had been carefully stored in the fridge, washed it and made a new paper-making tank.

4:4:7
4:4:8


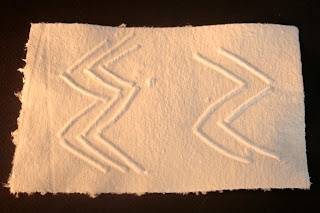
In February I cut pieces of cord-like string, I arranged them to create zigzags down the wet pulp- paper to create some rhythms reminiscent of the movements in water.  Though the imprint was clear and actually quite pleasing, the thickness of the string was such that the rest of the sheet of paper became distorted and other random ripples also appeared.  This too was the case with thinner cord more randomly sprinkled.  Two explanations occured to me: firstly the paper was too thin, secondly the pressing process was inadequate. Based on this second thought I set out to make a press with ply-board and four D-clamps.  Images 4:1 and 4:2 illustrate the difference when a paper press is used.


4:4:9

My first experiment with the press was to try embossing paper with a range of nets, both knitted in two different thicknesses of string and collected, for example fruit nets in plastic and man-made fibre.


4:4:10

Continuing the watery theme I looked out some samples from Module 2. Below are five machine embroidered samples: they all have raised surfaces created by using a range of thick and thin threads.

4:4:11

4:4:12

4:4:13
The embossing is really successful producing beautiful subtle and results on the delicate tissue paper however,  I wonder whether it will be possible to reuse the embroidered surfaces as the press will have flattened them considerably.

In another experiment I used stitched "fishy" patterns.  These designs are simple and stitched using upholstery thread.

4:4:14


4:4:15

In a further experiment I used a knitted string sample using the pattern on the left in Sample 4:4:14, a silk knitted tie and Module 2 ribbon made from gathered net.  These, however, were insufficiently well-defined or varied to make an interesting imprint, as are the two sizes of bubble pack in 4:4:17, though the smaller scale imprint works better.

4:4:16

4:4:17

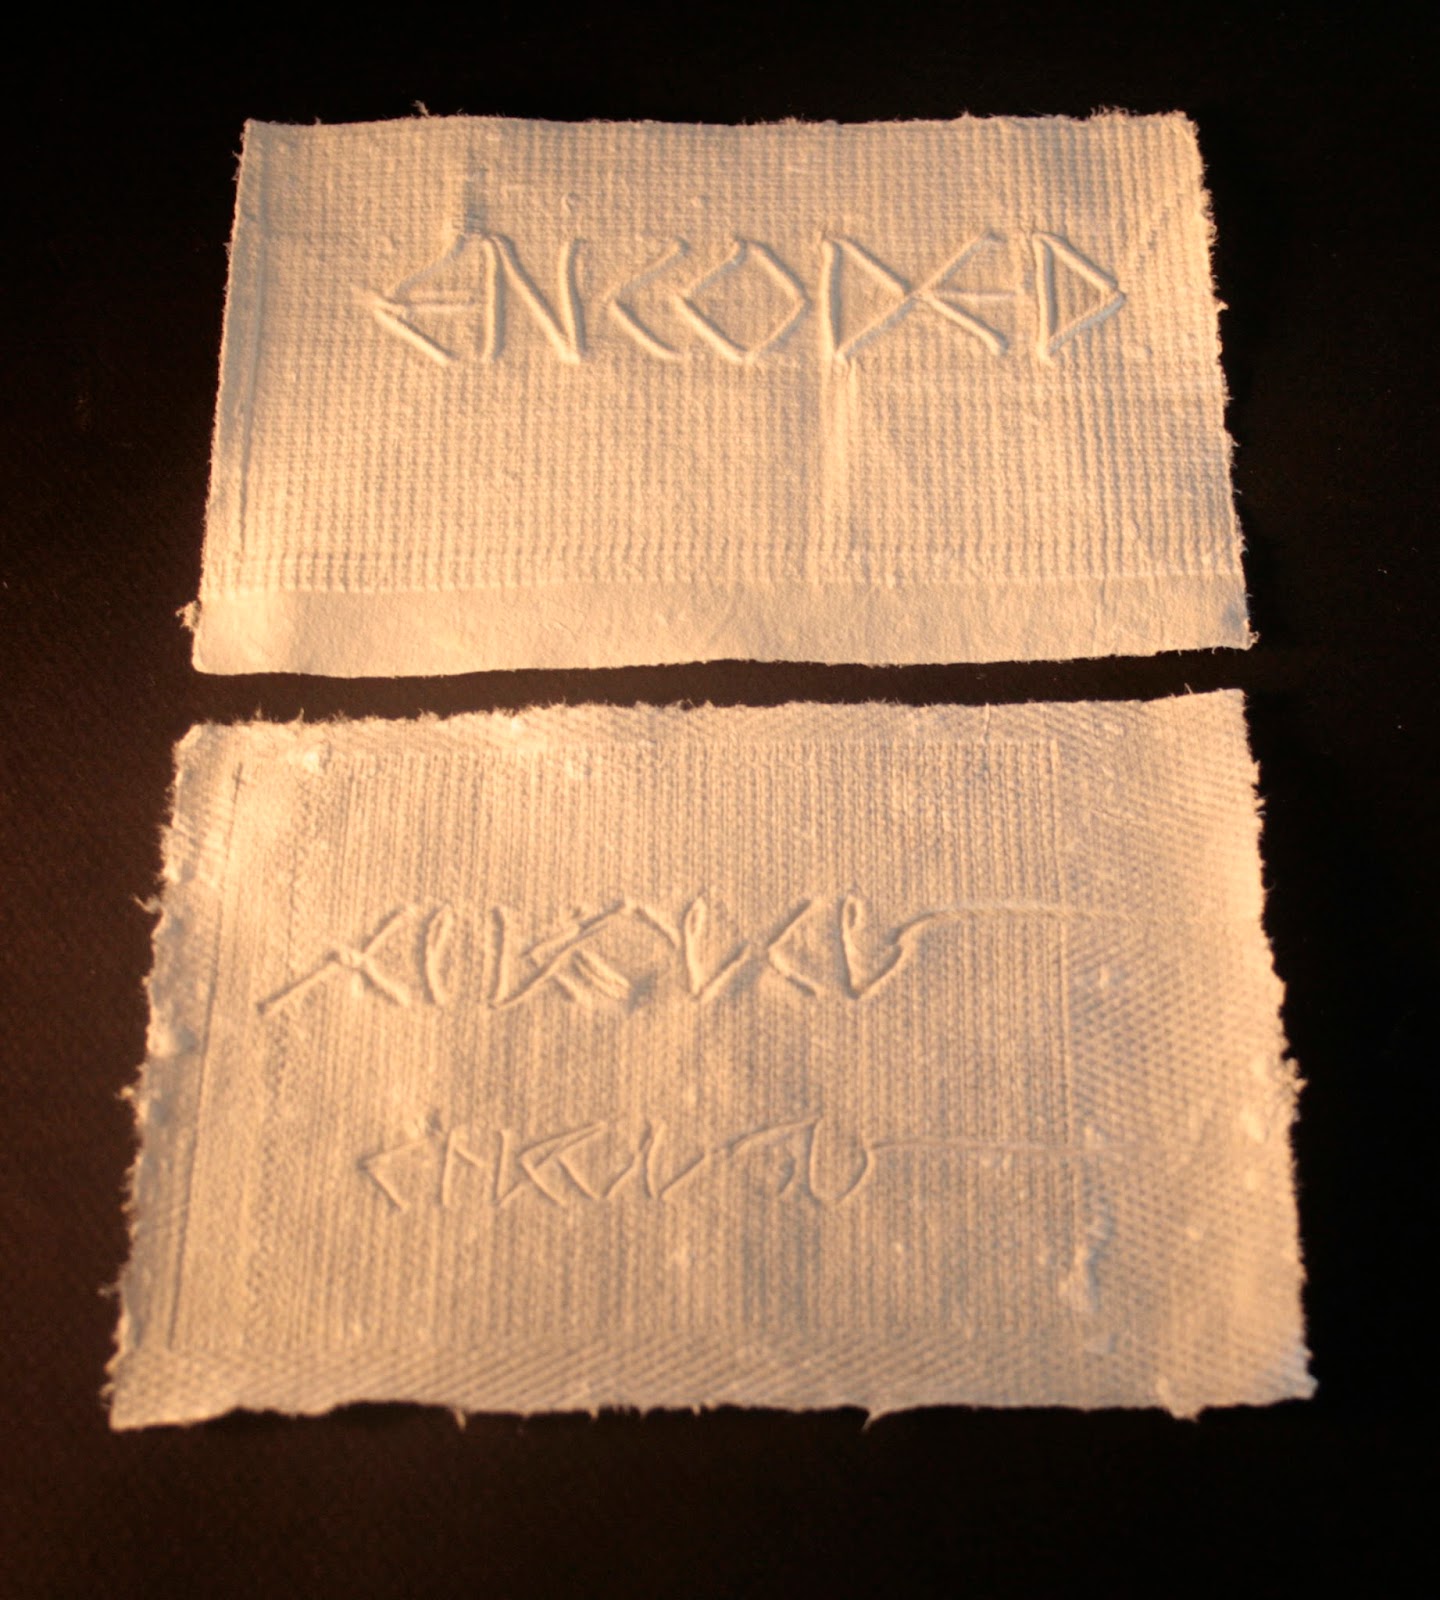
More successful still were the letters which I'd stitched on canvas, again with upholstery string.

4:4:18


Reviewing the samples above a number of things occur to me: firstly that the surface being used to emboss the wet paper pulp needs to have sufficient interest that lights and shades are created by the pressing process; secondly, that screwing down the press too tightly is likely to compress the embossing surface too much thus removing the opportunity to create light and shade.  It does of course depend on how the paper will be used and much more experimentation is needed to be sure about how tightly the D-clamps should be screwed down.

Sunday, 22 October 2017

Gansey Symposium and Creative Steps

Before our trip to America and quite by chance, I discovered that a Gansey Symposium would be held in late September at the museum in Sheringham.  I booked for the two days and it more than lived up to expectation marrying the social history of ganseys and their creation. 

A knitting workshop revealed how traditional patterns were charted and we were able to test out ideas on paper and in wool.  A number of experts, Stella Ruhe (collector and writer), Rita Taylor (designer and knitter) and Deb Gillander of Propagansey, guided and inspired, giving us insights into the significance of these garments.

The museum displayed beautiful examples of ganseys hung on poles above boats and other fishing paraphernalia. These were both from Holland and our own coastlines, some so fine they had been knitted on size 17 needles and with three-ply worsted wool: the stitch count 13 stitches and 19 rows to the inch.  Such beauty created on the move, in spare moments within a busy day.  The single-coloured surfaces carrying motifs connecting maker and wearer to the sea and the landscape of home.

These fascinating two days were an ideal way of trying to get back on track.  I am attracted to the repetitious way gansey motifs are used. I wonder whether it's possible to create knitted surfaces out of these patterns not in wool, but in string and then use these surfaces either to emboss handmade paper or make rubbings.

Tuesday, 17 October 2017

Using Your Time Well

So here I am again, using writing to try and establish what's going on.  The "just do it" mantra has worn thin of late and though I have a number of half started projects, the materials laid out ready on trays, the impetus to move on with them isn't there.  This feeling isn't trivial: it's the result of layers of concern and upset brought about by the death of friends, a neighbour's palliative care and my niece's late breast cancer diagnosis.  All this woven through with my elderly mother-in-law's reluctance to move into care.  These events are happening now, and they are quite enough, but their existence also wakens the past linking the two in a connective web which twists and tightens at the most inopportune moments.  It brings emotion too close to the surface, making all but the simplest things hard work.  I've called this post "Using Your Time Well" and that, especially given the circumstances, is still my intention but I'm not quite sure how to re-engage my creative drive.

Sunday, 20 August 2017

Chapter 4: Paper Making


Early Paper Making  Sessions:

A year or so ago I had the really lovely experience of making paper with Jean Mould Hart.  She's expert in this area.  She's also a very encouraging teacher who tries to build success into her workshops.  On the day our vats were filled and the paper pulp had already been made.  All we had to do was don our aprons and follow her demonstration: readying the deckle, swirling the paper pulp with our hand, swooping the deckle through the water, allowing it to drain.  That day we produced beautiful paper with paper linters and tried out masks, embossing and fringes.

It is quite another thing to paper-make yourself from scratch.  Two books have been helpful: "Paper Pleasure" by Faith Shannon, on the recommended list, and "The Handmade Paper Book" by Angela Ramsay."  They complement each other well.

Here below is my assembled kit: 14 litre clear plastic container, B&Q bucket bought for a pound (I have two -- one for light, one for dark), J-cloths,1  litre measuring jug, plastic spoon and deckle.  Also a small measuring spoon for dyes and essential rubber gloves.  I have added to this a sieve, helpful for straining pulp from water.  The processor is a charity shop buy for a £10 and very effective.


4:4:1

The following four images show the first phase of experimentation.  Initially I tore up, and added about a litre of water to between ten and fifteen envelopes with blue/grey/brown patterned insides, leaving it overnight.  The next day I processed it in short bursts then adding it to the vat with water to around the two thirds level.  The paper in image 2 is the result.

Already I'm learning from error.  I was not prepared to see lilac paper,  though the next time I used the same pulp I added Brusho and produced turquoise paper instead -- nothing wasted. Secondly, I need to allow the paper to drain fully before releasing the frame.  Thirdly, the j-cloths must be smooth otherwise creases and folds show on the dried paper.  Not bad though for my first solo attempt, the paper is even in thickness and there are no holes.


4:4:2

The paper in image 2 seemed rather solid, so this time I made some paper pulp from white tissue hoping to make something lighter, possibly translucent.  The tissue wasn't particularly good quality, however the paper is lighter the result of controlling how much pulp I took up on the deckle.  There are one or two thin patches and I later read about the importance of "throwing off the wave.  This is a quick shake side to side and front to back of the deckle done before all the water drains away.  It helps even out the pulp.  Another explanation for thin patches is that there isn't enough paper pulp suspended in the vat.


4:4:3
To some of these tissue samples I added thread or fabric snippings and stamp fragments.  The thread was metallic and did not seem to adhere well to the paper, however is presence left snail trail indentations.  The fabric and stamps are a pretty addition.

4:4:4


Retrieving the lilac pulp proved very simple: I added a teaspoon of Brusho which I diluted and added to the bucket, leaving it overnight.  By simply squeezing a small amount of pulp and leaving it to dry it's possible to see what shade it will be. The paper in image 5 was true to test.  I can see how easy it is to make a series of papers in different tones.


4:4:5

My final experiment in this phase was to try fringing. I layered wet paper from image 3 over dry from image 5 with lengths of string horizontally between. After it had dried a little I pulled it back sharply. Initially the results were spectacular with lovely white ripped tissue contrasting both in colour and texture with the turquoise paper.  As it dried, however, the tissue absorbed dye from the turquoise paper, a slightly disappointing result -- the shadows in the photograph are more interesting.


4:4:6


Next steps:

  • More embedding
  • Making paper on a range of meshes 
  • Adding shapes to paper.

Saturday, 19 August 2017

Chapter 3 : Grids


Below are a range of grids.  Those in image 3:1 are made of fairly rigid materials: metal, plastic and petit point canvas painted black.  In all but one sample, where diamond shapes are created, square shapes of various sizes are enclosed by the warp and weft threads.  In 3:2, the sample pack of wire- form from Artvango, there are eleven different styles.


3:1


3:2
In image 3:3 I have included a range of mesh made from silk, hessian and linen.  The image also includes black silk net, cotton scrim, a plastic net for holding oranges and in addition two handmade nets I knitted from two different thicknesses of string.  Both were knitted using 15mm needles.


3:3

Computer Generated Designs

I've been fascinated and also thrilled to see what can be achieved with the computer.  I have a very basic version of Word and at the beginning found importing and manipulating my lettering samples a real struggle.  Fortunately my neighbour's daughter showed me a few simple techniques and I was able to take it from there.

 The samples below have been created in such a simple way: stretch and squeeze, rotate, copy and paste and yet the designs are so effective.

The white samples are light and sketchy; the blue ones much more complete, especially samples 5-8. Little surprises are also revealed: a bird's footprint, tiny birds perched on wires, a set of library books; a certain delicacy and ghostliness prevails in some.

All the samples are beautiful and expressive.  They're subtle too and I found the rhythmic results created by the repetition of elements really pleasing to my eye: the echoing of a mark is so much greater than using it singly.  And mirroring, another technique, is a powerful way of integrating a design: compare samples 7 and 8 to understand this observation.

4:2:1

4:2:2

4:2:3

4:2:4

4:2:5

4:2:6

4:2:7

4:2:8

4:2:9

4:2:10

What a useful tool the computer can be.  It's possible to design, save, print off, undo a change and compare the two.  Although it shows the handmade-design's potential, and reveals some of the nature of the handmade it only hints at its tactile quality.  I suppose what I'm saying is the computer helps increase objectivity, and now I've learnt these techniques I will use them again, though nothing can replace running a hand or eye over a cloth surface, though making designs this way can be quite addictive -- below the first is a child's smocked dress, the second a trail of bird prints, ready to interpret in thorn stitch.

4:2:11

4:2:12


Sunday, 9 July 2017

Working Away

I was very disappointed with the run of samples 4:2:9 - 4:2:12, feeling they were hardly worth posting.  I'm not quite sure why this works but tidying my stuff, dusting and hoovering my workroom has helped me start again.  Maybe it was also having firm words with myself. Anyhow, today I set about producing a new set of samples.

So what I've done is review last session's work and pick out what I liked, which were the very angular letters and look for a different tool to work with.  I found a bag of corrugated card in various grades and used both cut and torn edges to apply black ink.  I found quite a lot to like:  the double line, both with a crinkly edge and more appealing still a sort of stitched mark.  Example 7 was just a single tube of the card.  My favourite was example 6, printed with a curved piece of card, forming each letter needed careful thought.


4:2:19
And now for bleach marks on Brusho, using the same tool, possibly there's some potential here though I'm not sure.

4:2:20
In 4:2:21 I've used the print sample 6 and created an allover pattern by working it continuously.

4:2:21
Below are examples of  lettering which has been layered onto 4:2:21.  Immediately below strips of crisp white tissue paper, which were first written on repeatedly with brush pen, allowing the ink to run out, have been cut and placed diagonally across the first layer. The first layer can be seen through the tissue.


4:2:22

In the following two examples a crayon rubbing of an individual PVA word has been cut in half lengthways and overlaid on the first layer.  This time the paper used was 40g Mitsumata Washi which as well as being transparent is closer in colour to the first layer.  The abstract marks also seem to have something in common so that accents and areas of density are created.

4:2:23

4:2:24

Reviewing today's work, I feel better pleased.  It is a relief to feel I have a sense of direction, but these results seem too rigid. I'd like to apply layers more directly.  The samples below show layers of rubbings on black tissue which is thin and soft and takes rubbings well.  On it I've used a variety of materials: wax crayon, pastels, chalk, Woody etc.

Two sorts of rubbing boards have been used for the three samples below: the word "encoded" stitched in string on canvas -- different thicknesses of string for different sized lettering.  I also wrote the word encoded in thick PVA glue.  These letters became very blurred as they dried but were an ideal when applied in black wax.  I particularly liked the black on black effect as it breaks up some of the uniform and opaque appearance of the black tissue.  It also adds depth.

In sample 4:2:27 the tissue was marked with bleached first with chalk and pastel string rubbings on top.

4:2:25

4:2:26

4:2:27

Now for two samples, 4:2:28 and 4:2:29.  In these white candle wax has been used as a resist.  The paper has then been flooded with dilute Brusho, revealing the letters and creating a patchy background.  Finally handwriting has been applied with a thick graphitint.  A final black wax rubbing has been applied to 4:2:29.

4:2:28

4:2:29

In sample 4:2:30 a Brushoed sheet has been printed all over with a corrugated card edge, then turned at right angles and "encode" written on it in gold Woody.  An attempt to add gold rubbings is disappointing.  The thicker paper does not respond to the technique as well as tissue.

4:2:30
Back to thin paper in 4:2:31, his time the Mitsumata Washi.  Whilst it takes rubbings it's really not strong enough and the addition of a wash causes it to tear.  In 4:2;32 two rubbings have been applied over each other on thicker paper.

4:2:31
4:2:32

I like the delicate markings of 4:2:31 so I take a PVC rubbing board with the word "encode" on it, cut it vertically and then reassemble it.  The delicate marks are made in candle wax over-painted with dilute Brusho.
4:2:33

4:2:34

A return to the ideas in 4:2:17, but this time black ink and bleach have been applied to a Brusho wash.  Further writing has been applied at right angles.